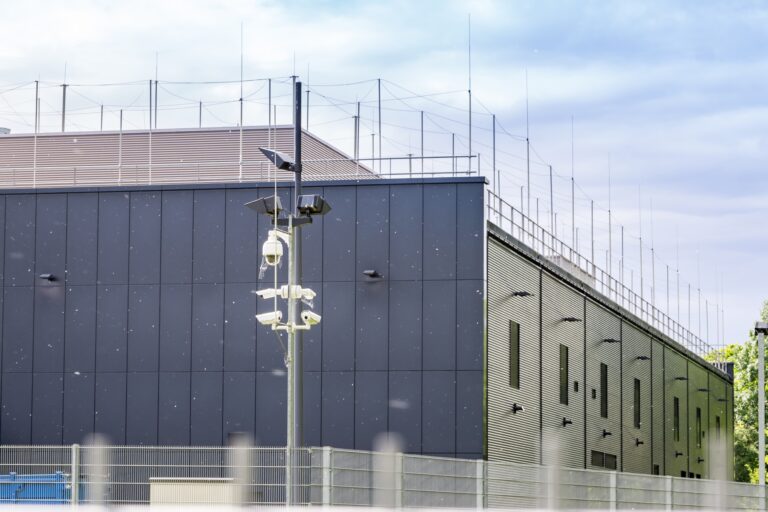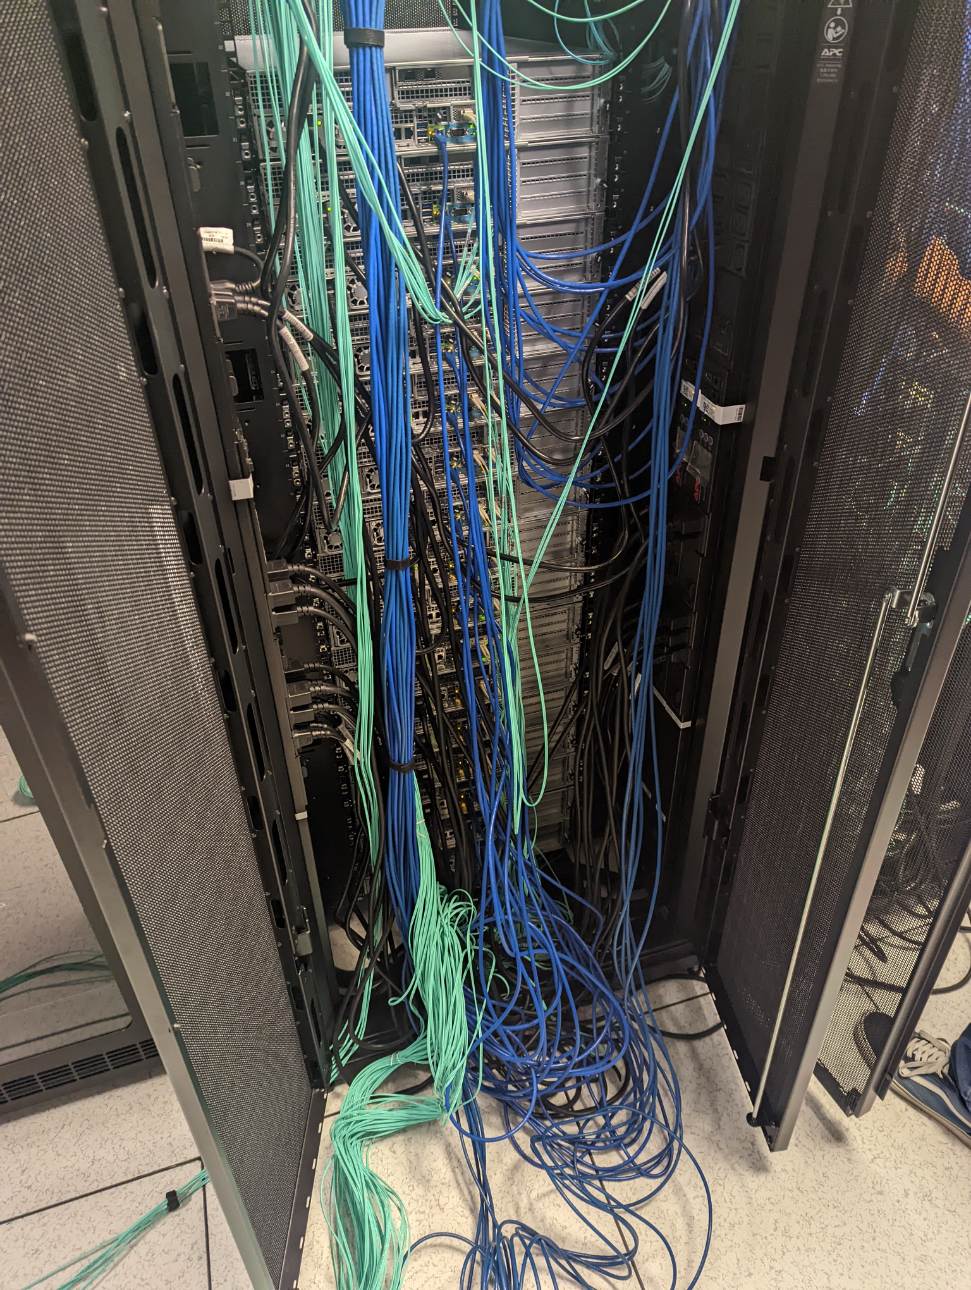
You are walking into your server room to troubleshoot a critical network issue, only to find yourself staring at what looks like a plate of digital spaghetti. Tangled cables snake everywhere, labels are missing or illegible, and you can’t tell which cable connects to what. Sound familiar?
Why Server Rack Cable Organization Matters More Than Ever
Poor cable organization does more than look messy. Uptime Institute’s outage data shows that more than half of significant data center outages cost over $100,000, and that human error plays a major role in many downtime incidents.
The Hidden Costs of Cable Chaos
When network cables are poorly organized, the problems grow fast and affect more than just looks. In a tangled rack, technicians spend much more time trying to trace connections and fix issues because they can’t quickly find the right cable, which makes troubleshooting slower and increases the chance of mistakes. Disorganized cabling also blocks airflow through racks and pathways, forcing cooling systems to work harder. This can make equipment run hotter than it should, reducing performance and shortening hardware life.
Messy cables don’t just slow work they make simple updates and maintenance harder because it is easy to snag the wrong cable or disturb other connections. Loose and tangled cables also create safety hazards, from tripping risks for staff to accidental unplugging during routine tasks. These combined effects show why good cable management is about efficiency, reliability, and safety, not just neatness.
Step 1: Plan Your Cable Management Strategy
Before touching a single cable, create a comprehensive plan. This isn’t just about making things look neat, it’s about building a long-term system that will serve your organization for years.
Assess Your Current Infrastructure
Start by documenting your existing setup so you know exactly what you are working with before you plan cable routes. Take note of your servers, switches, and other devices, power distribution units (PDUs) locations, and available rack space to plan clean cable paths that avoid clutter, maintain airflow, and simplify maintenance.
Design Your Cable Routing Strategy
Once you understand your current layout, think through how cables will move through the rack so they stay organized and accessible. A common approach is to run cables across the rear of the rack before routing them up or down through cable managers, which keeps them grouped by function and reduces tangles. This helps make individual cables easier to trace later, supports cleaner bundling, and leaves room for future changes without creating mess or obstruction.
Pro Tip: Reserve the left side of your rack for power cables and the right for network cables to prevent interference and simplify troubleshooting.
Step 2: Choose the Right Cable Management Hardware
Horizontal Cable Managers
Install 1U or 2U horizontal cable managers between groups of equipment. Horizontal cable management systems provide organized pathways for cables and prevent them from sagging or interfering with equipment ventilation. They also maintain proper bend radius while keeping cables accessible.
Vertical Cable Managers
Vertical cable managers, typically 22RU or 44RU, mount on the sides of your rack and provide channels for cables running the full height of the rack. These managers keep vertical bundles organized, reduce the chance of cables rubbing against sharp edges, and make it easier to follow a cable from top to bottom without tangles. When routing through vertical managers, it helps to pick units that let you access cables from the front or back so maintenance and changes are faster and less disruptive.
Cable Ties and Velcro Straps
Avoid zip ties for permanent installations, they’re difficult to remove and can damage cables when over-tightened. Instead, use reusable Velcro straps that allow for easy modifications and additions.
Step 3: Implement Proper Cable Lengths and Types
Measure the path each cable will take and add a little extra slack for service loops, then order cables to fit. Avoid excess length that creates tangles and blocks airflow. Invest in high-quality Cat6A or fiber optic cables to maintain signal quality, reduce interference, and simplify routing. This small upfront cost makes installation, maintenance, and future upgrades easier while keeping your network reliable.
Best Practice: Keep cables grouped by type, leave space for airflow, and avoid over-tightening or sharp bends that can damage wires. Pre-made cables in standard lengths (0.5m, 1m, 2m, 3m) often provide the best balance of availability and organization.
Step 4: Master the Art of Cable Labeling
Develop a Consistent Labeling System
Develop a consistent labeling system so anyone can quickly tell where a cable runs without guessing. Start by deciding on a clear format that shows information like the source device, the port number, and where the cable ends, and write it down so your team uses the same system every time.
Example: “SW01-P24→SRV05-NIC1” clearly indicates this cable runs from Switch 1, Port 24 to Server 5, Network Interface Card 1.
Label Both Ends
Always label both ends of every cable. Use a quality label printer with vinyl labels that won’t fade or peel over time. Place labels close to the connectors but not so close that they interfere with insertion or removal.
Color Coding Strategy
Implement a color-coding system for different cable types: standard network, management/IPMI, uplink/trunk, and storage network connections.
Step 5: Execute Your Installation Plan
Start by installing equipment in order, beginning with PDUs, then vertical cable managers, network switches, horizontal managers, and servers from bottom to top. Route cables carefully, handling uplink cables (switch-to-switch connections) first before moving to server connections so critical paths stay clear. Leave small service loops (6-12 inches) near connections to allow slack and prevent stress on connectors. Bundle cables neatly and secure them with Velcro straps, keeping each one accessible and easy to trace.
Step 6: Maintain Your Organized System
Once your cables are routed and labeled, the work isn’t done. Keeping your system organized requires ongoing attention. Start by documenting everything clearly, including diagrams of equipment placement, connection charts, labeling conventions, and photos of the completed setup. Establish simple procedures for adding new equipment, handling temporary connections, and updating records so changes don’t create confusion later. Schedule regular audits to catch issues early, remove unused cables, and ensure labels remain legible. With consistent maintenance, your racks stay safe, efficient, and easy to manage over time.
Advanced Tips for Professional Results
Separate Power and Data Cables
Maintain at least 6 inches of separation between power and network cables to prevent signal problems. When cables must cross, do so at 90-degree angles to minimize interference.
Plan for Growth
Leave 25-30% spare capacity in your cable management systems. This allows for future expansion without requiring a complete reorganization.
Consider Fiber Optic Cables
For longer cable runs or high-speed network needs, fiber optic cables are a strong choice because they support much higher bandwidth and are immune to electromagnetic interference, which can slow or disrupt copper cabling. Fiber cables are also thinner and lighter, which makes them easier to route in dense rack environments and can help improve airflow. Their performance and scalability make them a forward-looking option as network demands continue to grow.
Common Mistakes to Avoid
Avoid common cable mistakes so your rack stays reliable and easier to work on. Don’t tighten cable ties too much because that can stress the wires and shorten their life. Respect the minimum bend radius for network cables so they do not kink or weaken, and keep power and data cables separate to prevent interference and confusion. Also make sure cables do not block airflow around equipment, since good airflow helps cooling systems work better and keeps hardware running smoothly.
The ROI of Proper Cable Management
Proper cable management delivers clear operational benefits. When cables are neatly organized and labeled, technicians can troubleshoot and maintain systems more quickly, reducing downtime and the risk of human error. Organized cabling also keeps airflow paths clear so cooling systems run more efficiently, and it makes adding or moving equipment faster and less disruptive.
Ready to Transform Your Server Room?
Organizing network cables in server racks isn’t just about aesthetics. It’s about building a reliable, maintainable setup that supports your business operations. The systematic approach outlined above has helped hundreds of organizations transform chaotic server rooms into efficient, professional installations.
Remember, the key to success is planning first, then executing systematically. Don’t try to organize everything at once. Tackle one rack at a time, and maintain your standards as you grow.
At Camali Corp, we’ve been helping organizations design, build, and maintain critical infrastructure since 1988. Our team of experts can help you develop and implement a comprehensive cable management strategy that fits your specific needs and budget.
Need professional help with your server rack organization? Contact our infrastructure specialists for a consultation. We’ll assess your current setup and provide a detailed plan for transforming your server room into a model of efficiency and reliability.